Overview
FS Panel Studio has powerful tools for editing Gauges. You can change the appearance of any Gauge, and also change the behaviour of XML Gauges. In this tutorial, we'll change the way our FS2002 Cessna!Airspeed Gauge looks.
Step 1 - Make a copy of the Gauge (optional)
In our example, we'll edit the Cessna!Airspeed Gauge directly. But by doing so, we'll change the appearance of this Gauge in all Panels which use it. You'll probably want to first create a copy of the Gauge with a new name to prevent this. We've installed FS2002 in the C:\FS2002 directory on our example system, so our Gauges are found in the C:\FS2002\Gauges directory. Copy the Cessna.gau file to a unique name, for example MyCessna.gau, in the directory. You can use the Windows explorer, or the MS DOS command line.
If you make a copy, use FS Panel Studio to delete the original Cessna!Airspeed Gauge on your Panel and replace it with MyCessna!Airspeed.
Step 2 - Open the Gauge
Start FS Panel Studio and open the Panel and Window you wish to edit. We'll continue to use the C172 Custom Panel we've been using in our tutorials.
There are two ways to start the Gauge editor with the Cessna!Altimeter Gauge. If you're displaying a Panel which contains the Gauge (which you should be), select it with the mouse, right click it for a context menu, and select Edit this Gauge. You can also bring up the Gauge Editor from the Gauge: Gauge Editor menu pick or corresponding toolbar button.
Find the Gauge on your panel, select it, right click for a context menu, and click on Edit this Gauge.
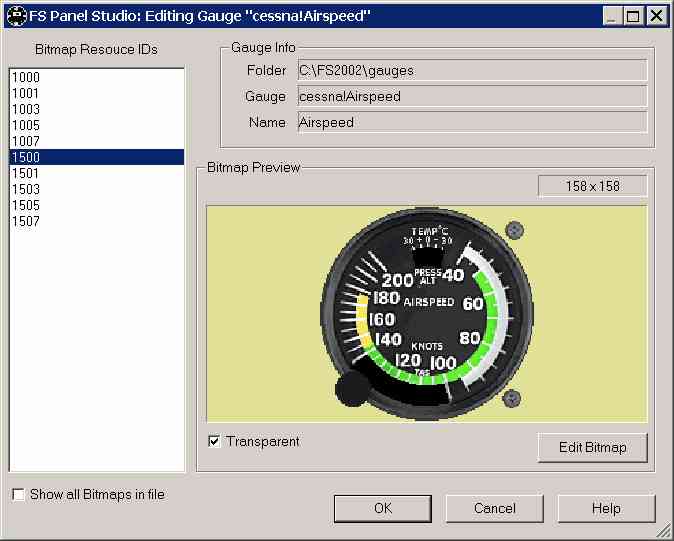
The Gauge Editor will start, and, if the Gauge is an "old" style .gau file (which the Cessna!Airspeed is) the Editor will by default display the primary background bitmap. If the Gauge is an XML format Gauge, you'll see a different window, which we'll cover later on.
Because we're not editing an XML Gauge, we can only change the bitmap resources in the file. These resources are listed on the left of the dialog. Each number corresponds to a bitmap stored internally in the Gauge file as a Windows resource.
There may be two versions of each bitmap stored in a Gauge -- a high resolution version and a low res one. Flight Simulator will display one or the other depending on the resolution of its display. The two bitmaps can be identified by the fact that they differ by 500 in their Bitmap Resource IDs. In the example above, the primary background bitmap is ID 1500. It's the high res version, and a lower res version exists as resource 1000. The implication is that if you have a Gauge with both versions, you'll need to edit both, or the Gauge will look different in Flight Sim depending on the graphics display size you run in.
Step 3 - Edit the Bitmap
Let's edit the primary bitmap. Select 1500 in the Bitmap Resource IDs list, then click on the Edit Bitmap button. FS Panel Studio will start the Paint program you've selected in the Preferences dialog. If you haven't selected a Paint program, you'll receive a warning. In this example we're using JASC Paint Shop Pro. Note that while your Paint program is running, FS Panel Studio will be suspended and perhaps appear to be "locked up". In reality, it's just patiently waiting for the Paint program to finish.
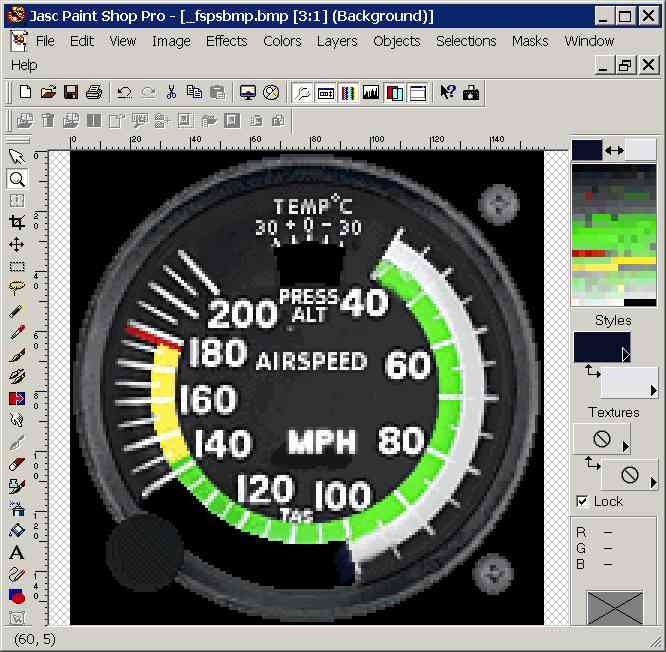
To show what's possible, we've made a few changes. The Knots label has been removed and replaced it with MPH. Also the Green and White arcs have been extended. Note that we're only changing the way the Gauge looks, not the way it works. The bitmap may say MPH, but it will still display in knots.
Make your required changes, then save the file and exit the Paint program. FS Panel Studio will "wake up" and detect that you've modified the bitmap, and reload it. Compare this view of the Gauge to the one in Step 2.
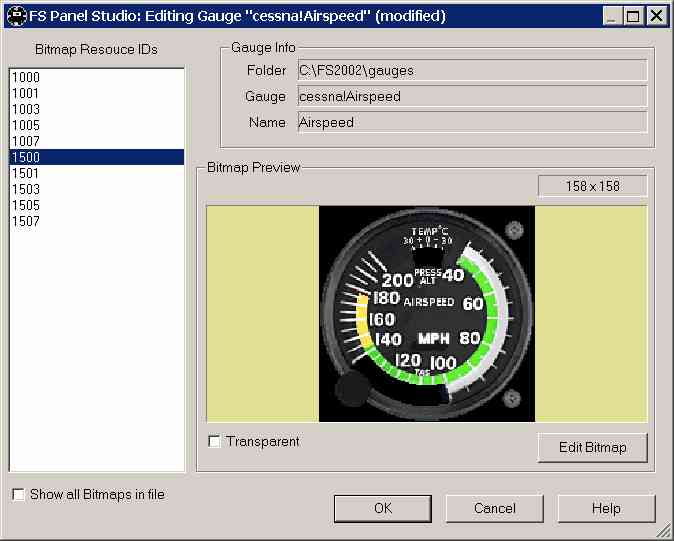
If you make a mistake, click on Cancel and the original Gauge will be restored.
Once you're done making changes, click the OK button. FS Panel Studio will modify the Gauge on disk with the new bitmaps.
Step 4 - Verify your work
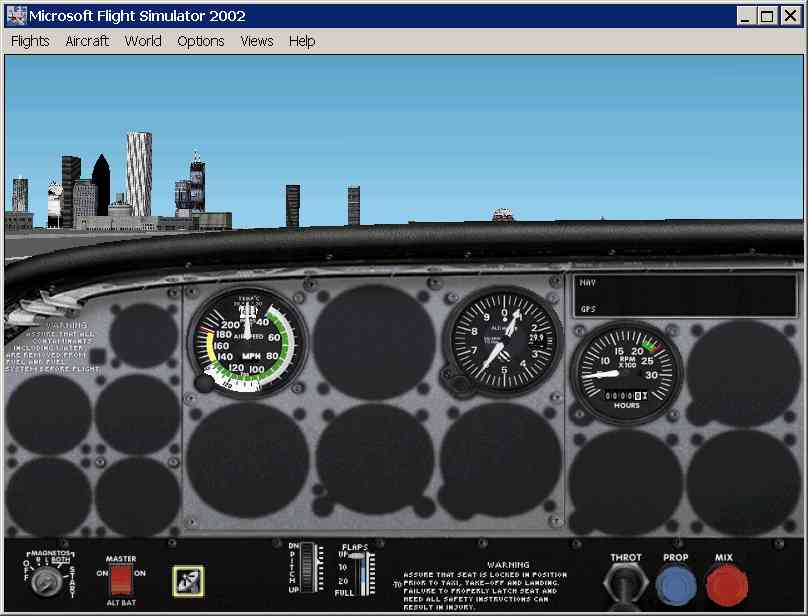
Start FS2002, and load a Panel which references the edited Gauge. You should see your new, modified Gauge. In this example, we've used the same Panel we've been using in the Tutorial series, the C172 Custom Panel of the C172SP Skyhawk.
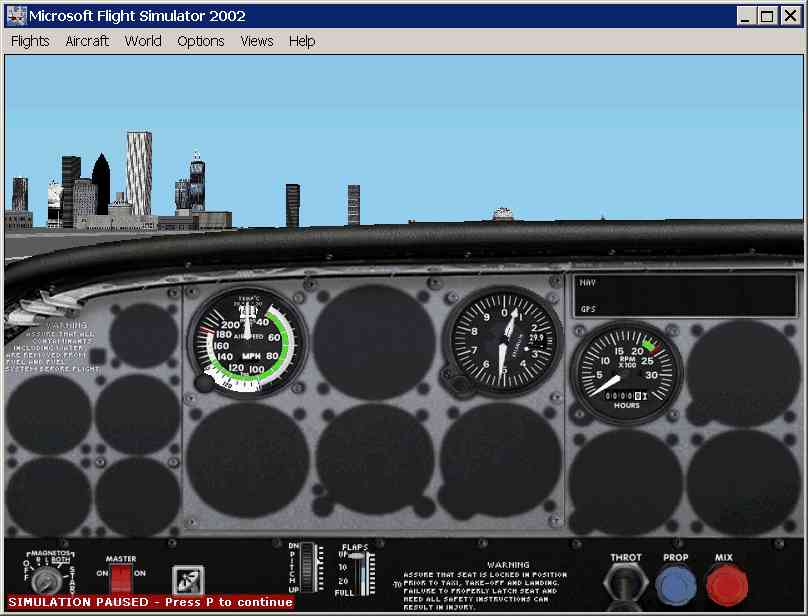
Compare this view of the Airspeed Gauge with the one in the Adding a New Panel to an existing Aircraft Tutorial.
Step 5 - Edit an XML Gauge Bitmap
Let's now edit an XML Gauge. The only candidate on our panel is the GPS Icon gauge, all the others are the old .gau format. Select it with the mouse in FS Panel Studio, right click for a context menu, and click on Edit this Gauge.
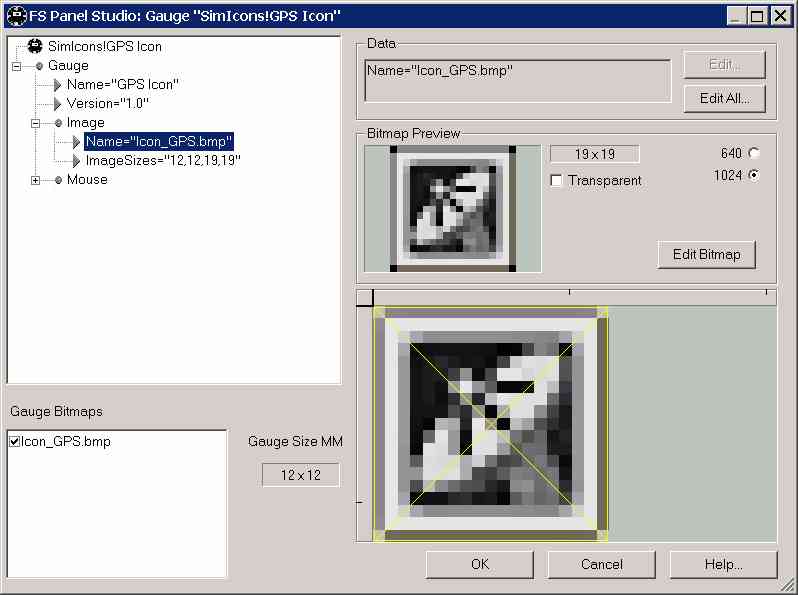
The XML Gauge editor will start. On the left, displayed in a tree, are the internal workings of the Gauge. Click on the + icons to expand out the tree. If you select an Image Element with your mouse, it will be displayed in the Bitmap Preview.
XML Gauges may have many dozens of bitmaps, but the GPS Icon Gauge is a simple button, and has only one. Let's edit it. Make sure it's selected, as above, and click on Edit Bitmap. Your paint program should run, allowing you to make your changes. Edit the bitmap, and save your work.
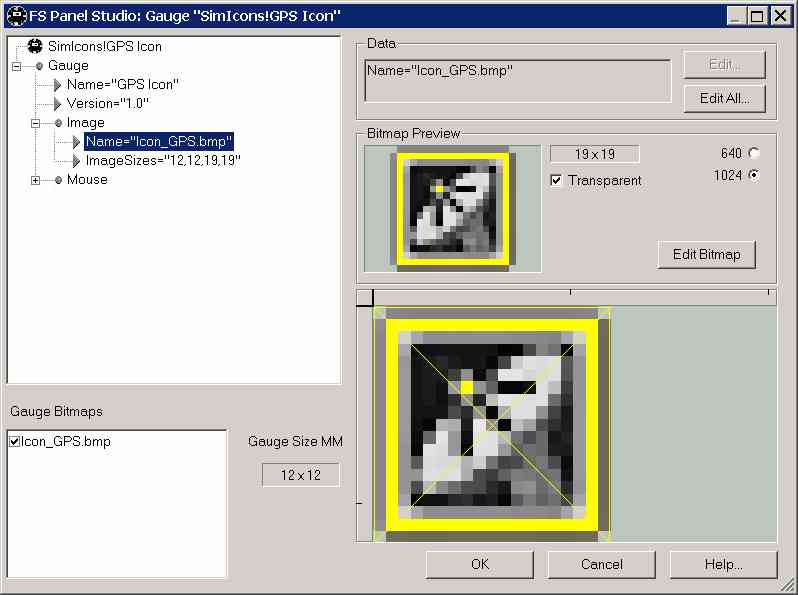
We'd like our button to stand out a bit more on the Panel, so we've drawn a yellow border around it.
The Gauge editor will detect that you've made changes, and reload the bitmap.
Step 6 Edit XML Gauge Behaviour
We can also change how the XML Gauge works. If you consult the Adding a popup GPS to a Panel tutorial, you'll see that the GPS Icon Gauge controlled the Window Ident specified in the Mouse:Click Element. This Element is the bottom item on our tree. Let's change this to some other Ident so it will control a different Window. Use the mouse to select it, then click on the Edit button.
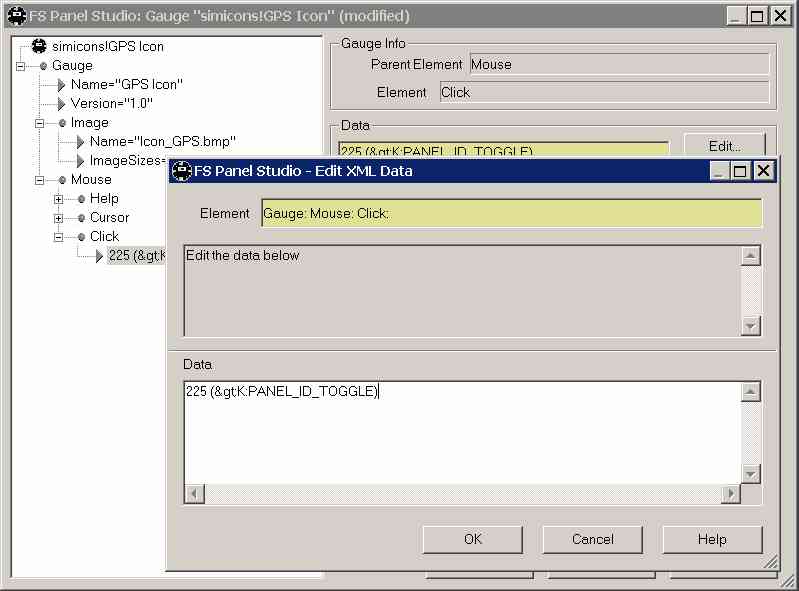
An edit window will be displayed, allowing you to directly edit the data in the window. Change the 225 to a new Window Ident, say, 100. Now, when the button is pressed in FS Panel Studio, if there is a Window with a Window Ident of 100, it will pop up.
To understand the syntax of the Click function, you'll need to consult the Microsoft XML Gauge documentation. Just a note on the > string. The < and > characters have special meaning in XML, and can't be used in the XML data. Instead, if you need these characters in your Gauge, they are represented by the > and < strings. Consult any XML reference book for more info.
Once you've finished your edits, click on the OK button. Click OK again in the main Gauge Editor window. FS Panel Studio will build you a new XML Gauge with your modified bitmaps and behaviour.
Step 7 - Check your Work
Start FS2002, and load the Panel with the modified Gauge. Notice the GPS Icon button now has a yellow border (compare this to Step 4.) If you click on it, the GPS Window will no longer pop up. You can use FS Panel Studio to modify the Window Ident of the GPS Window to 100. Once you do, the popup GPS function will again work.