Overview
Adding a popup GPS to a panel is easy. To do so we'll add a toggle button Gauge to our Main Window, which will bring up a GPS Gauge (in a Window) when pressed.
How do we get the GPS button to bring up the GPS Window? To make this work, we have to understand how the GPS button works. The GPS button tells the simulator to toggle a particular Window based on its Window_Ident. The value of the Ident is hard coded in the button itself, but with FS Panel Studio's Gauge Editor, we're able to display this value. The key is to then make sure the GPS Window has an Ident corresponding to the toggle button.
To recap -- we'll be adding two Gauges and one Window. The first gauge is a GPS Toggle Button Gauge (on the main Window), which will control a new Window on which we'll place our GPS Gauge. We'll then edit the new Window to make its Window_Ident match the toggle button. This is easier to do than describe...
Step 1 - Open your Panel
Begin by starting FS Panel studio and opening the Panel you wish to edit. For this example we will use the Panel we created in the preceding tutorial, Adding a New Panel to an Existing Window. In this case, the Aircraft is the C172, and the Panel is Panel.Custom.
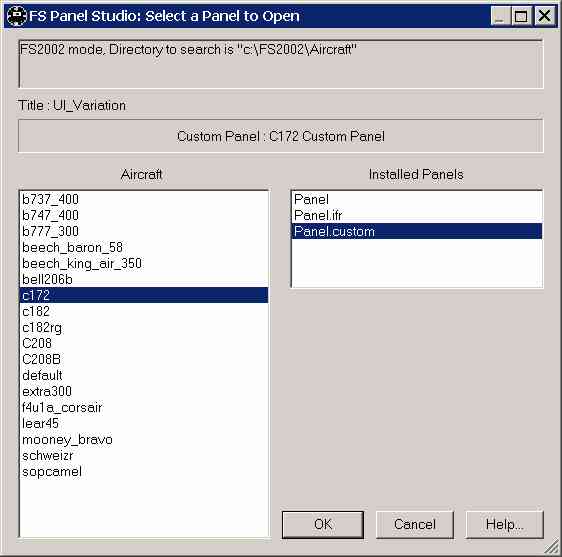
Select the Aircraft and Panel, then click OK.
Step 2 - Select the Window to edit
Open the Window which will have the GPS toggle button. In our example, we only have one Window, Main Panel.
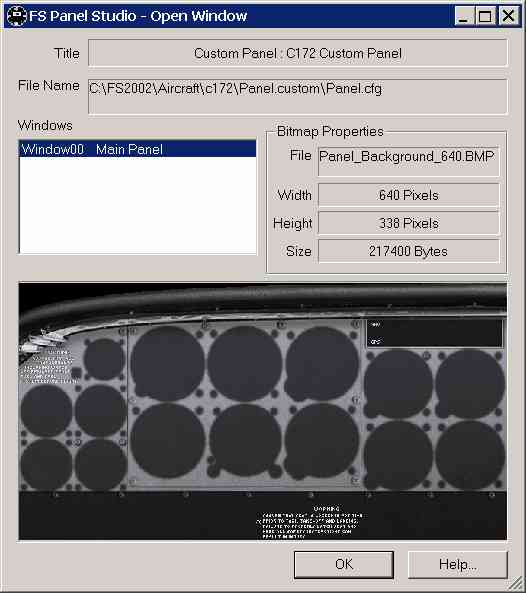
Select Window00 Main Panel, then click OK.
Step 3 - Add the GPS Icon Gauge
When the Window has loaded, select the Gauge: Add Gauge menu pick. For our GPS Toggle Button, we'll use a Microsoft supplied Gauge. In the Gauge Files list, select the simicons.cab Gauge. Then in the Gauges in File list, select the GPS Icon Gauge.
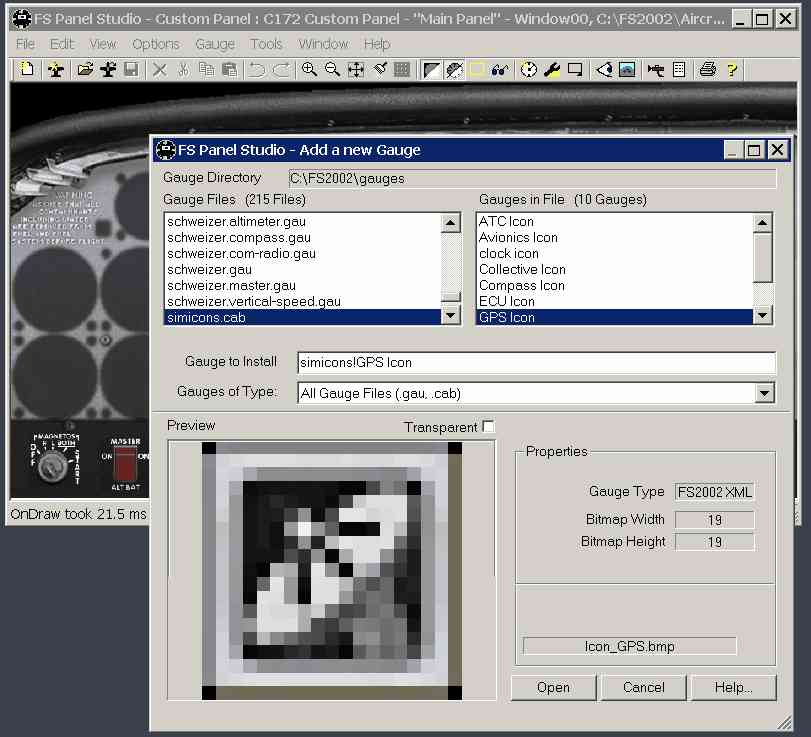
Select Open. The new Gauge will be placed in a default position on the Panel. You can move it and size it to wherever you like - we placed it on the lower left of the Panel. At this point our Panel looks like this:
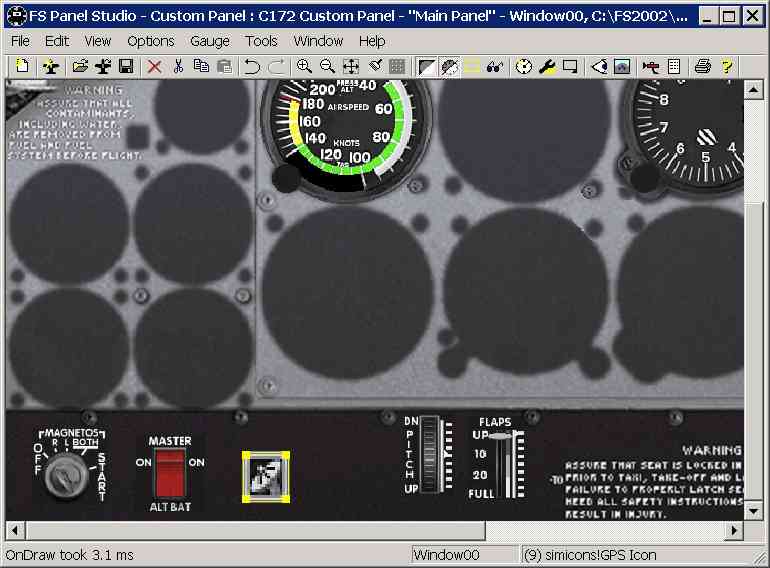
The GPS Gauge is highlighted. We've placed it next to the Master switch.
Step 4 - Determine our new Window Ident
Before we create the GPS Window, we'll need to determine the proper Window_Ident to use for it. To do so, we'll need to edit the GPS Icon Gauge.
If the GPS Icon Gauge is not selected, use the mouse to left click on it. Then right click to bring up the context menu. From this menu, select Edit this Gauge... This will bring up the Gauge Editor.
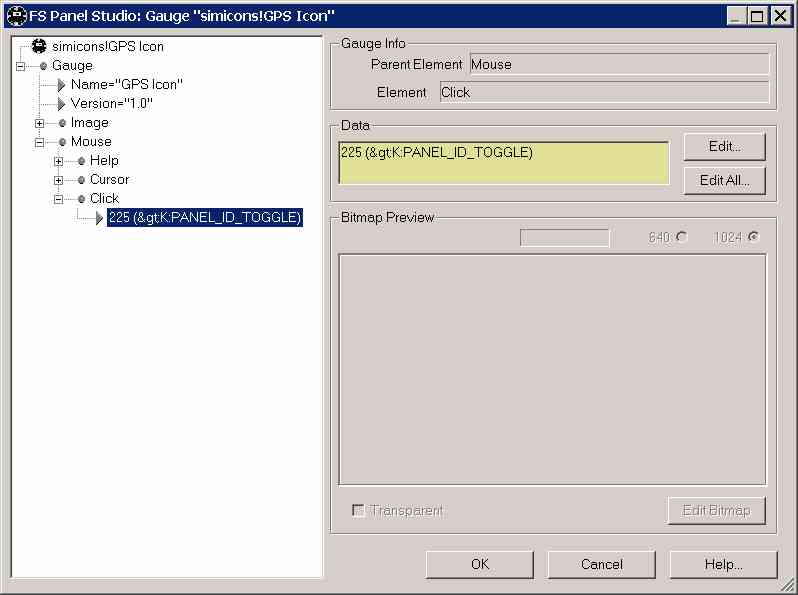
You can examine and edit the entire internal structure of the Gauge using the Gauge Editor, but all we need to know is contained in the Click Element of the Mouse Element. Expand the tree shown on the left of the dialog by clicking on the + signs, until you see the contents of the Click element, which should be 225(>K:PANEL_ID_TOGGLE). Without getting into too much detail, this Element tells the simulator that whenever the user clicks on this Gauge, it should toggle the visibility of the Window which has a Window_ident of 225.
We now know our new GPS Window must have its ident set to 225. It's also possible to change this value in the Gauge, simply by double clicking on the string in the left pane, or clicking on the Edit... button, however then other Flight Sim Panels which rely on the default behaviour will no longer work. You can create a custom GPS Icon Gauge by copying the contents of the Gauge file (simicons.cab) to a new name and then editing it.
Step 5 - Create the GPS Window
We now need to create a Window for the GPS. Select the Window: Add New Window menu pick. The following dialog will be displayed.
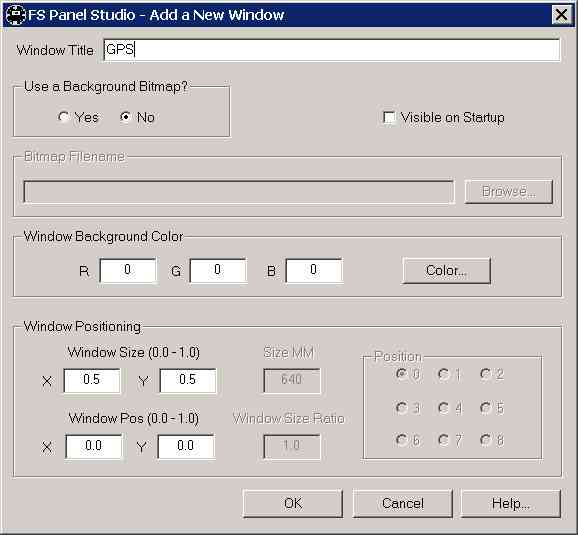
Type in a name in the Window Title field. For our example, we'll use GPS. Since this popup Window will only have one Gauge, the GPS, we don't really need a background bitmap. Select No in the Use a Background Bitmap? box. We can leave everything else with their default values.
Click on OK. FS Panel Studio will create a new Window, Window01, with no Gauges, and select it as the current Window.
Step 6 - Add a GPS Gauge to the new Window
Follow the same procedure as Step 3 to add a new Gauge to our Window. This time, pick the gps.gau entry in the Gauge Files list, and the gps in the Gauges in File list, as shown below.
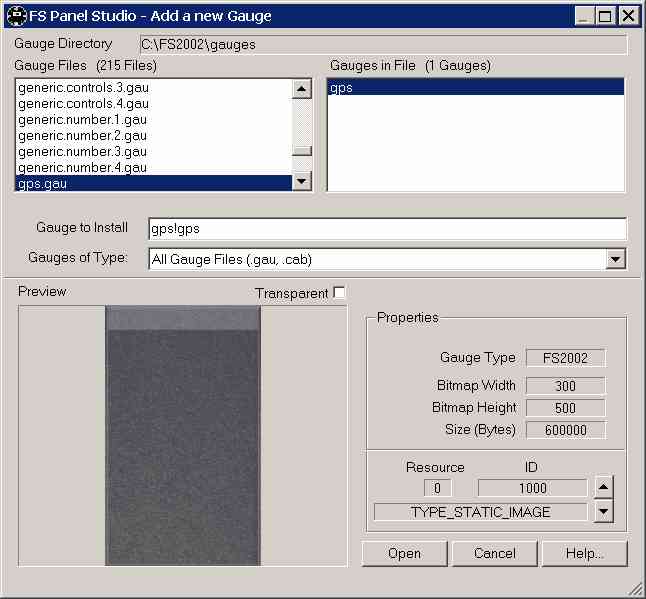
The GPS is also a Microsoft supplied Gauge. To install the Gauge, select it in the Gauges in File pane, and click Open. FS Panel Studio will place it in a default position on your new Window. Move the Gauge to the top left corner of the Window. Leave it at its default size (Size X will be 300, note the Bitmap Width and Height shown above) for now.
Step 7 - Change the Window Ident
We now have a new Window, with a GPS Gauge. However, we'll need to set the Window's Ident to match the toggle button, and fine tune the size of the Window to fit the Gauge. From the menu, select Window: Properties....
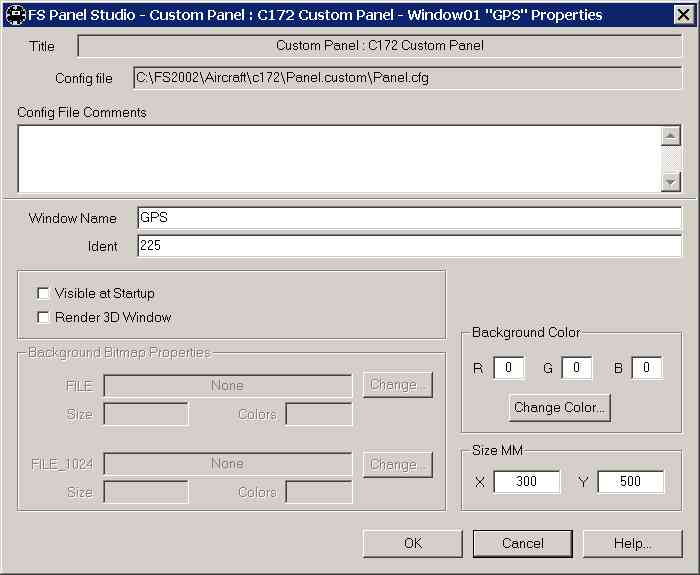
We want the Window to fit the Gauge exactly, so set the Size MM X and Y values to 300 and 500. We determined these values in Step 5. In the Ident field, enter 225, to match the Ident the toggle button will control. Click OK.
In the GPS Window, use the mouse to select the Gauge, and stretch it so that it matches the size of the Window background. Save your work using the File: Save menu pick.
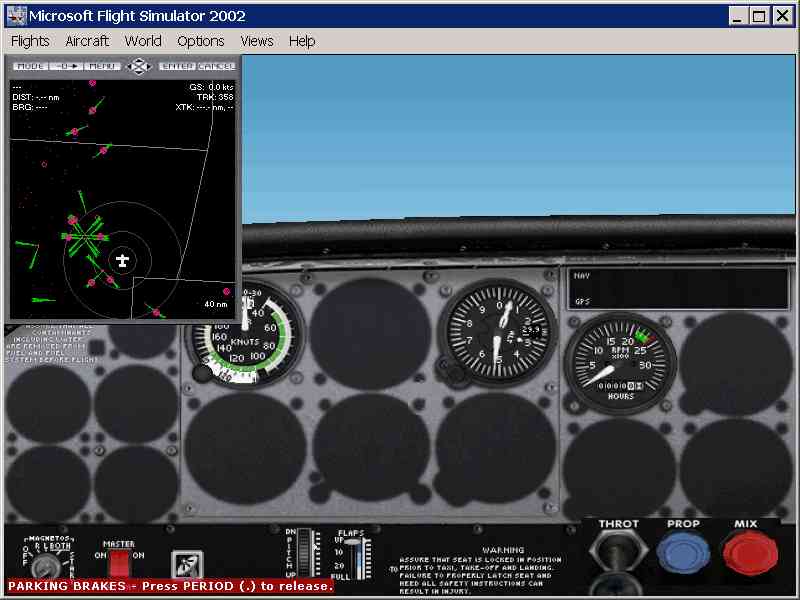
Step 8 - Verify your work in FS2002
To verify our work, start FS2002. Select the C172SP Skyhawk Aircraft, and the C172 Custom Panel. Once loaded, click on the GPS toggle button, and voila, the GPS is displayed! You can fine tune the initial size and position of the Window using the Window: Set Default Position dialog in FS Panel Studio.